
To use voice to text on iPhone or iPad, tap the microphone key on the keyboard for quick dictation, or use a dedicated transcription app when you need live captions, long recordings, or saved transcripts. Built-in dictation is fastest for short notes. A dedicated app fits better for meetings, lectures, and accessibility use where accuracy and saved records matter.
You're in a meeting, class, restaurant, or airport gate, and you catch only half the conversation. The rest disappears into background noise, fast talk, or a language switch you weren't ready for. That's the challenge how to voice to text is trying to solve, it gives you a written layer to follow when listening alone isn't enough.
For Deaf and Hard of Hearing people, students, caregivers, travelers, and anyone working in noisy spaces, voice-to-text isn't a novelty. It's a way to keep up, review details, and reduce the pressure of having to catch every word in real time. On iPhone and iPad, the feature set is broad enough that you can use built-in dictation for quick notes or a dedicated app for live captions, file transcription, and transcript review.
Table of Contents
- Why Voice to Text Matters for Everyday Communication
- Setting Up Voice to Text on iPhone and iPad
- Built-in Dictation Versus Dedicated Transcription Apps
- Improving Transcription Accuracy in Real-World Settings
- Transcribing Recorded Audio and Video Files
- Choosing the Right Voice to Text Approach for Your Needs
Why Voice to Text Matters for Everyday Communication
A student in a lecture hall hears a sentence clearly, then loses the next three when a chair scrapes, a neighbor whispers, and the speaker turns away. A project manager in a crowded team meeting catches the opening of an action item, then misses the deadline. A traveler in a train station hears words in another language, but not enough to answer with confidence. Voice-to-text helps in all three moments because it turns speech into something you can read, scan, and check again later.

The shift from niche dictation software to everyday device features matters. Understood notes that most devices now include built-in dictation tools across Windows, macOS, Android, iOS, and Chrome OS, which shows how voice typing has moved into mainstream use rather than staying hidden inside assistive tech. Microsoft's accessibility guidance also shows that modern speech input can include editing help such as automatic punctuation, so it's no longer just raw text capture, it can support real writing.
Practical rule: use voice-to-text when missing one sentence would create extra work later, not just when typing feels inconvenient.
That's why voice-to-text fits accessibility, but also ordinary life. It helps with meeting notes, lecture captions, quick replies, healthcare visits, and travel conversations where memory alone isn't reliable enough. Once you start thinking in terms of follow-along text instead of perfect listening, the value becomes obvious.
Setting Up Voice to Text on iPhone and iPad
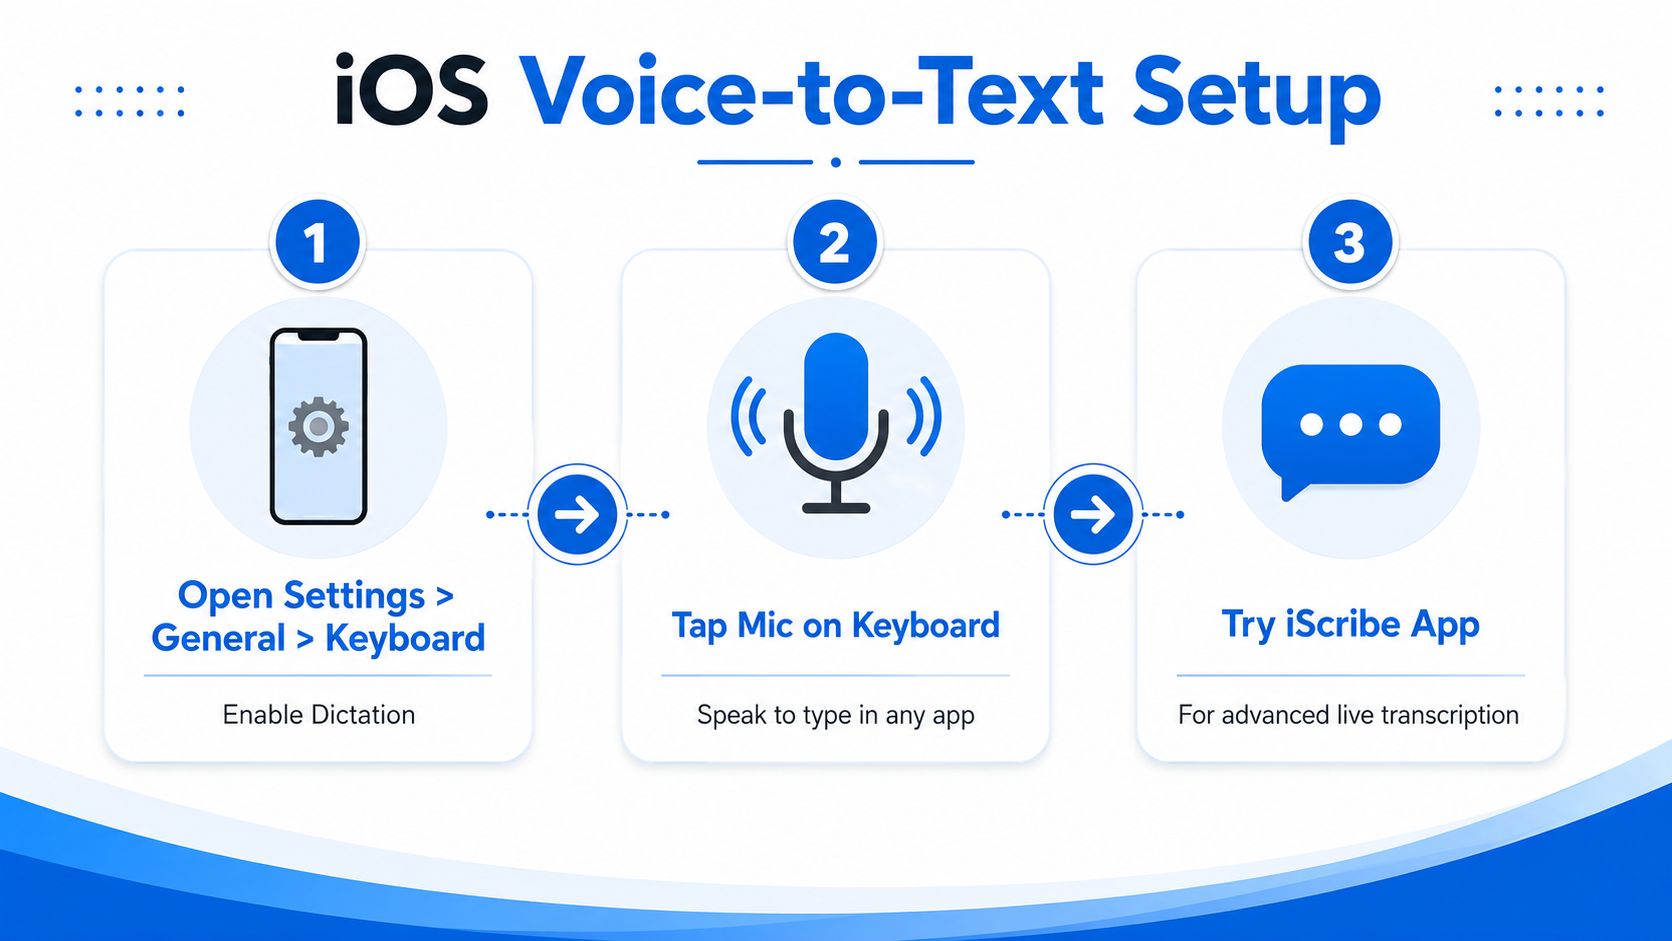
On iPhone and iPad, the easiest starting point is the keyboard dictation feature. Google's training for Voice Typing in Docs shows the same basic flow users rely on in practice, open the dictation tool, tap the microphone, then speak into the device microphone. On Apple devices, that same idea shows up in system keyboards and in apps built for live transcription.
If you only need short notes, quick reminders, or a few lines in Messages, built-in dictation is usually enough. If you need live captions for a class, a meeting, or a conversation you want to save and review later, a dedicated app makes more sense. Live Transcribe iSrcribe is one example of a dedicated iPhone app focused on showing what's being said.
The setup starts with the right device settings, then moves to real use. Choose the language or language variant you hear in daily life, not just the language you type in. If your device offers text size or readability controls, raise them before you rely on the transcript in a live setting, because a readable screen matters as much as the words themselves.
For iPhone users who want a more detailed comparison between Apple's built-in tools and a dedicated option, the guide on Apple Voice Memos vs iScribe is a useful companion.
When to start with the keyboard mic
Built-in dictation works best when the task is short and simple. A grocery note, a text message, or a quick reminder doesn't need a full transcript workflow. The microphone button is also easier for people who want to avoid extra apps and just get words onto the screen fast.
When a dedicated app fits better
A long lecture, a multilingual meeting, or a conversation you may need to revisit later calls for a tool that can keep the transcript visible, save it, and organize it afterward. iScribe supports both live, in-person transcription and file-based transcription in one iOS app, with 100+ languages and variants for multilingual contexts.
Use the simplest tool that still gives you a record you can trust later.
Built-in Dictation Versus Dedicated Transcription Apps
Built-in iOS dictation and dedicated transcription apps solve related problems, but they don't behave the same way. The built-in option is often the fastest way to turn a few spoken words into text inside another app. Dedicated tools are built for sustained listening, transcript review, and real-time follow-along in settings where the conversation matters more than the message box.
| Feature | Built-in iOS Dictation | Dedicated Apps (iScribe) |
|---|---|---|
| Best for | Short notes, messages, quick edits | Live conversations, lectures, meetings, saved transcripts |
| Real-time transcript view | Limited to the app you're typing in | Designed for continuous on-screen transcription |
| File transcription | Not the main workflow | Supports live and file-based transcription |
| Multilingual use | Depends on system and app support | 100+ languages and variants |
| Review and saving | Basic text entry | Transcript saving, summaries, and follow-up use |
The difference matters most in messy real life. A phone call in a café, a classroom with side chatter, or a clinic visit with rushed back-and-forth often needs a tool that keeps going after the first sentence. For teams that also need captions on video, a resource on software for automating captions can help frame the broader captioning workflow without turning voice-to-text into a one-tool-fits-all decision.
Dedicated apps also tend to support more of the after-work. iScribe includes summaries and key points, which can be useful when you don't want to reread a full transcript just to find the action items. That said, cloud-based tools can depend on internet access, so the “better” choice changes with your room, your privacy needs, and your signal strength.
If you're comparing app styles more broadly, the guide on best voice to text app is worth reading alongside this one.
Improving Transcription Accuracy in Real-World Settings
Voice-to-text doesn't fail because the idea is bad. It fails because the room, the mic, and the speaking pattern are hard. Google Cloud recommends testing with at least 30 minutes of representative audio and suggests 30 minutes to 3 hours as a practical sample range for checking speech recognition quality, because the recording environment changes the result. It also requires a 100% accurate ground-truth transcript to compare against machine output and compute Word Error Rate, or WER, the standard way to measure transcription quality.
Start with your own audio, not a demo
Vendor demos usually sound cleaner than your actual environment. If you want to know whether voice-to-text will hold up in a classroom, kitchen, café, or conference room, use recordings from that same setting. Google Cloud's guidance is clear that benchmark audio should come from the same equipment and environment as the intended use case, because a clean sample from somewhere else can hide the problems users will hear.
Accuracy follows context. A tool that looks precise in a quiet demo can fall apart in a crowded room with echoes, overlapping voices, or people talking fast.
AssemblyAI's accuracy guidance recommends testing 50 to 100 samples across accents, speaking speeds, domain terms, and edge cases. It also reports a comparative study where Whisper large reached 4.7% WER on average, Whisper medium 5.6%, NeMo 7.2%, Google 13.3%, and wav2vec models 10.8% and 21.1%. A common rule of thumb from that same guidance is that 5 to 10% WER is high quality, while above 30% is poor enough to frustrate users and require heavy manual cleanup.
What helps in noisy or multilingual spaces
Noise control matters, but it's not the only thing. Tips from CALL Scotland stress microphone placement, short practice phrases, proofreading, and checking the recording environment before relying on live text. VoiceDash also recommends speaking in complete phrases, adding punctuation when needed, and reviewing names, numbers, punctuation, and formatting before saving or sending the text.
- Use a close microphone: a mic near the speaker cuts down background noise and captures more of the voice.
- Speak at a steady pace: rushed speech and turn-taking are harder for any system to track.
- Review the transcript before you trust it: names, technical terms, and numbers are where small errors cause the biggest problems.
If you need a deeper look at room noise, the guide on how to remove background noise from audio fits well with this part of the workflow.
Transcribing Recorded Audio and Video Files
Live captions are only half the story. Recorded meetings, class lectures, interviews, and voice memos are often easier to transcribe after the fact, because you can upload the file, check the result, and clean it up before anyone depends on it. That makes file transcription useful for researchers, students, journalists, and anyone who wants searchable notes instead of a pile of audio.
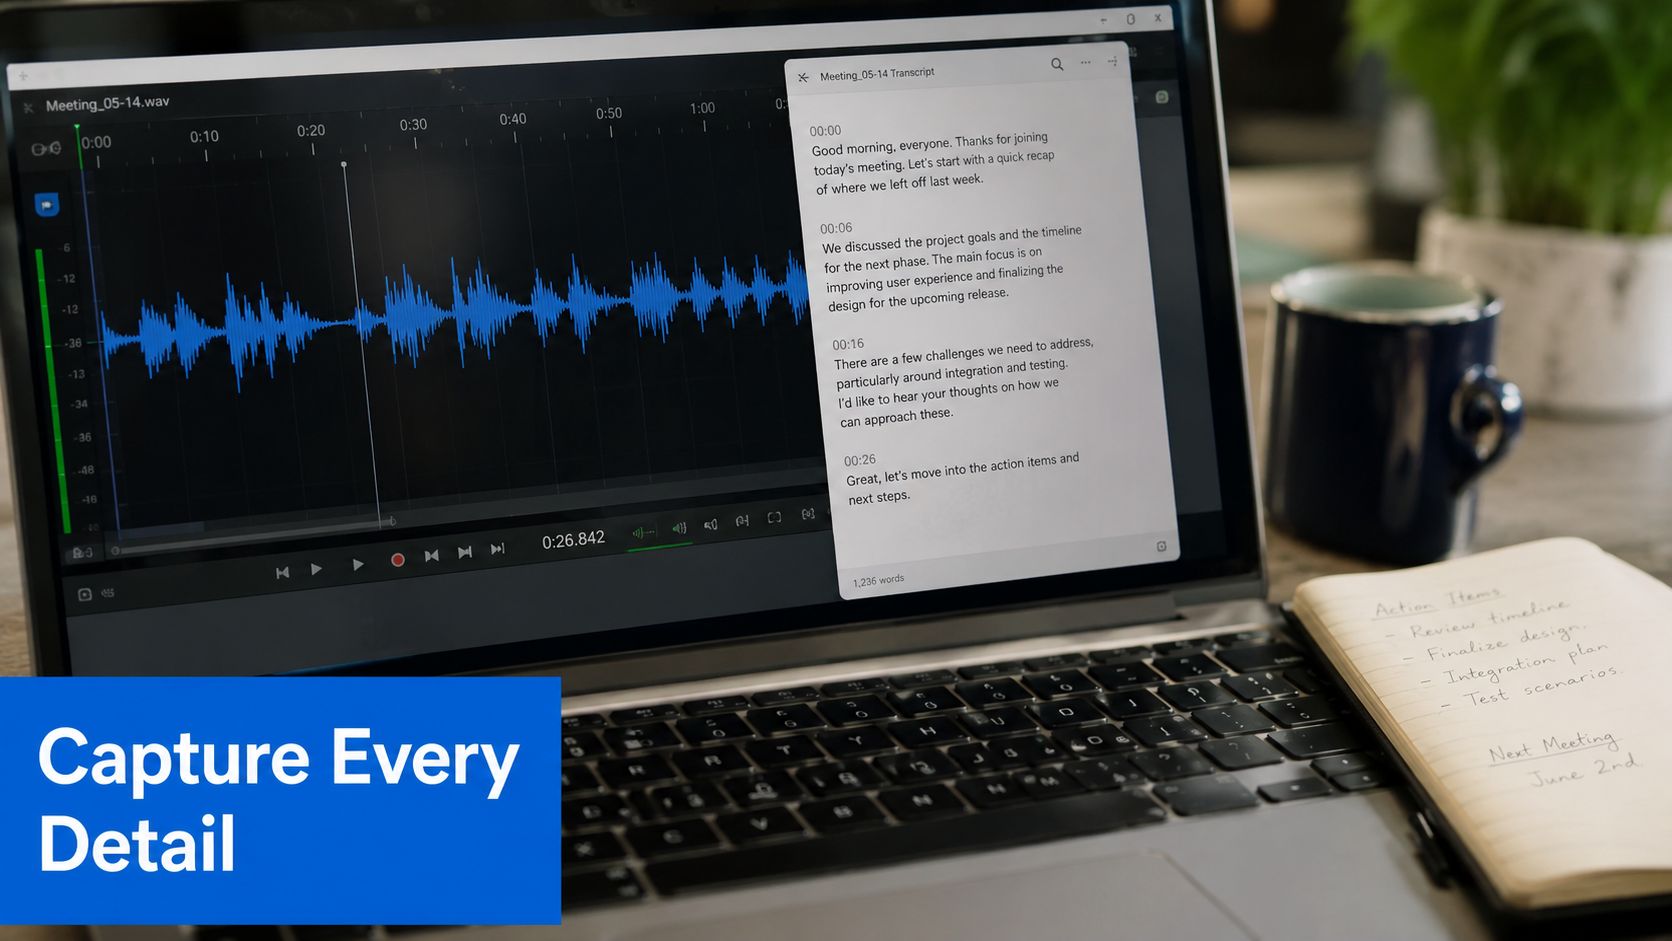
In iScribe, the workflow covers both live speech and uploaded files in the same app. That matters because the choice between live and recorded transcription isn't just technical, it's practical. A classroom lecture may be best captured live, while an interview recorded on your phone may be cleaner when processed afterward.
For sensitive material, connectivity matters. iScribe's live transcription is cloud-based and requires an active internet connection for real-time transcription, so it won't behave like an offline recorder when signal drops. That trade-off is central when you're in a hospital corridor, on a train, or anywhere you can't assume stable Wi-Fi or mobile data.
If your end goal is accessibility for videos, the workflow overlaps with captioning too. A guide on improve video accessibility for learners can help you think about transcripts as a foundation for subtitles, summaries, and searchable reference material.
A simple file workflow
Upload the recording, let the app process it, then review the transcript for names, numbers, and speaker changes. If the app offers summaries or key points, use them as a shortcut for long recordings, but don't skip the transcript if the content is important. Save the final version in a folder or notes system you will return to, because a transcript only helps if you can find it later.
For iPhone users who want a voice memo specific walkthrough, the guide on iPhone voice memo to text is the most direct next step.
Choosing the Right Voice to Text Approach for Your Needs
The right voice-to-text setup depends on the moment, not on a universal “best” app. If you only need to draft a text message or dictate a short note, built-in iPhone dictation is the lightest choice. If you need live captions in class, transcripts for meetings, or a saved record of a long conversation, a dedicated app makes more sense.
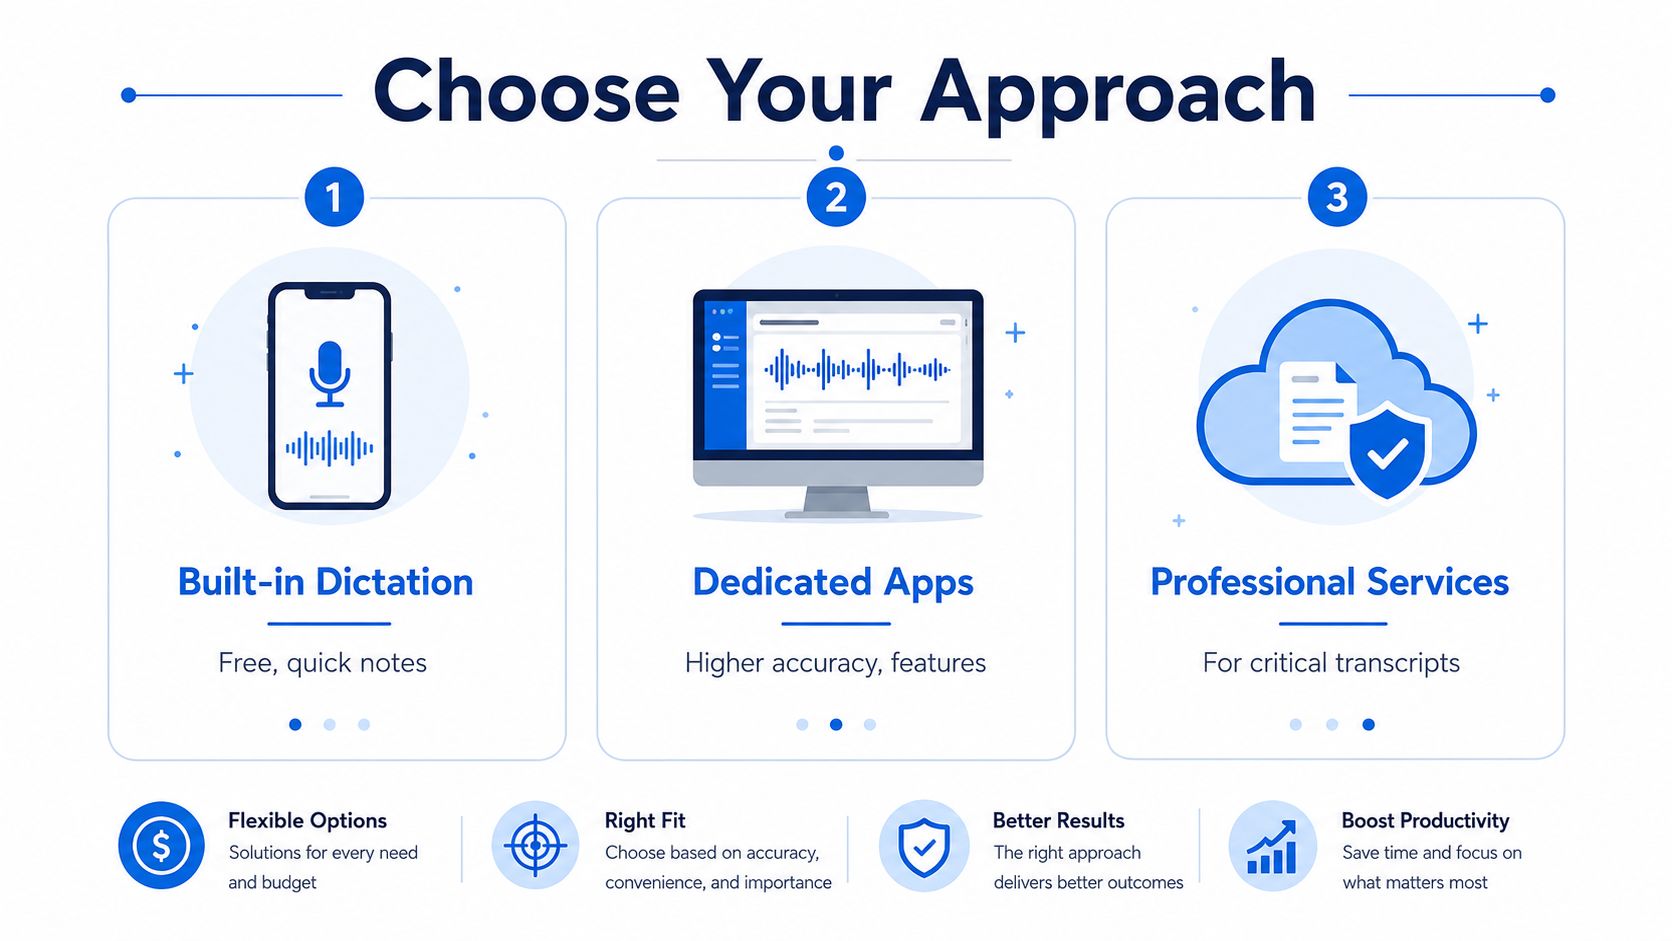
A good rule is to match the tool to the cost of being wrong. If a missed word is harmless, keep it simple. If a missed word means a missed instruction, a missed diagnosis, or a missed travel detail, use a setup that supports review, saving, and clearer on-screen follow-up.
Here's the practical shortlist:
- Quick messages and notes: built-in dictation is enough.
- Live conversations and lectures: a dedicated transcription app is usually a better fit.
- Recorded interviews and voice memos: file-based transcription saves time and gives you something to review.
- Noisy rooms or multilingual settings: test on your own audio before you trust the result.
iScribe Live Transcribe is one option for people who want live, in-person transcription plus file transcription in a single iOS app, along with language coverage and transcript-saving features. If you're deciding whether that kind of workflow fits your day, visit iScribe Live Transcribe and compare it with the way you take in speech, not just the way you hope a transcript should work.
How do I turn on voice to text on my iPhone?
Open any app with a keyboard, tap the microphone key near the space bar, and start speaking. Your words appear as text. If you do not see the microphone key, enable Dictation in Settings, General, Keyboard, and turn on Enable Dictation.
Why is voice to text not working on my iPhone?
The most common causes are Dictation turned off in Settings, a weak internet connection, the wrong microphone selected, or a Bluetooth device capturing the audio. Check each one in order, and test with the built-in Voice Memos app to confirm the microphone works.
What is the best voice to text app for iPhone and iPad?
For live, in-person conversations and saved transcripts, a dedicated app like iScribe works well because it focuses on real-time captions, file transcription, and multiple languages. Built-in dictation is fine for short notes, but a dedicated app fits meetings, lectures, and accessibility use better.
Can I convert a recorded audio or video file to text on iPhone?
Yes. Built-in dictation only handles live speech, so use a transcription app that lets you import an audio or video file and convert it to text. This is the simplest way to caption a lecture recording or a saved meeting.
How do I make voice to text more accurate?
Speak clearly, reduce background noise, and hold the device or microphone closer to the speaker. In noisy or multilingual settings, test with your own audio rather than a quiet demo, and pick a tool that supports the languages you actually use.